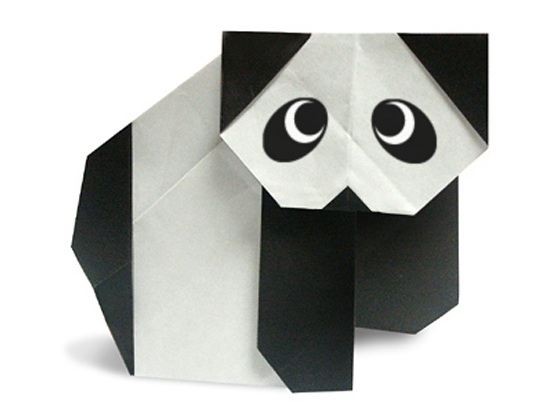
Easy Origami Panda Instructions
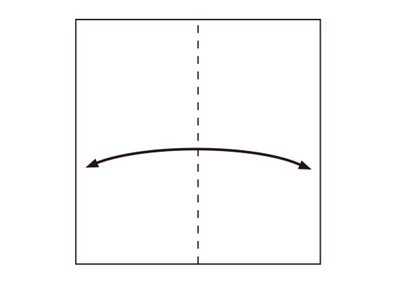
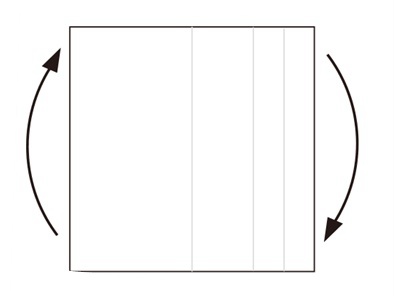
Step 1
: Start with a square piece of origami paper.Fold the left edge meet to the right edge to make a crease,then unfold.
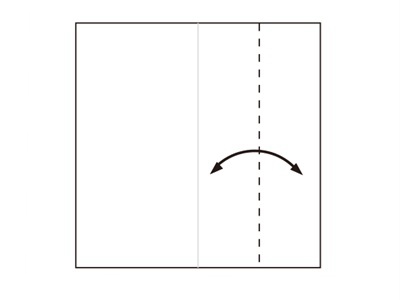
Step 2
: Fold the right edge meet to the center line to make a crease,then unfold.
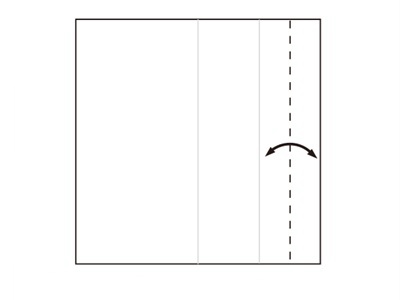
Step 3
: Fold the right edge meet to the crease made in the previous step,then unfold.
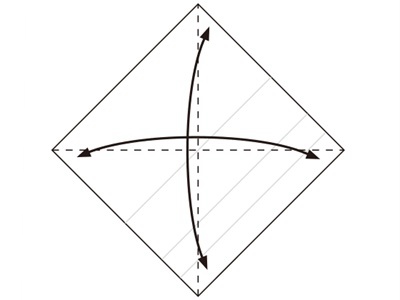
Step 4
: Turn the paper around,Rotate the paper about 45 degrees.
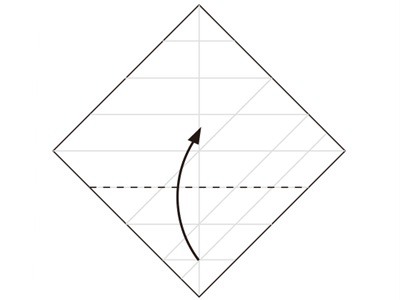
Step 5
: Fold in half twice make creases and fold back.
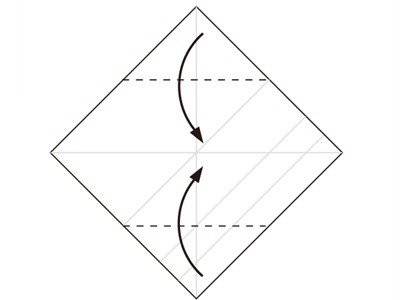
Step 6
: Fold the top corner meet to the center point.Do the same on the bottom side.
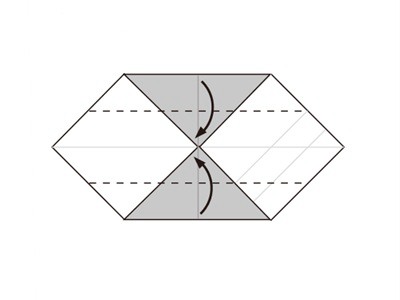
Step 7
: Fold the bottom edge meet to the center line.Do the same on the bottom side.
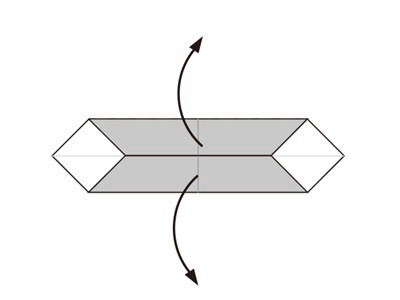
Step 8
: Open.
Step 9
: Fold the bottom part upward along the dotted line.
Step 10
: Fold the upper flap downward along the dotted line.
Step 11
: Repeat step 9 and step 10 on the other side.
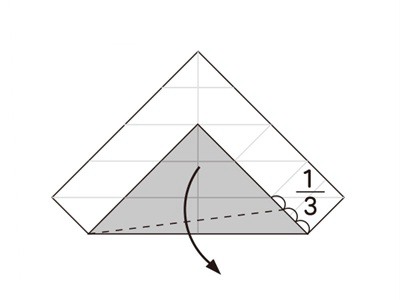
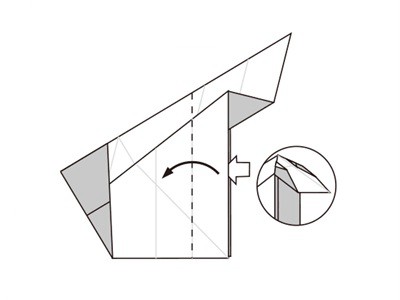
Step 12
: Fold the right corner to the right along the dotted line, then unfold.
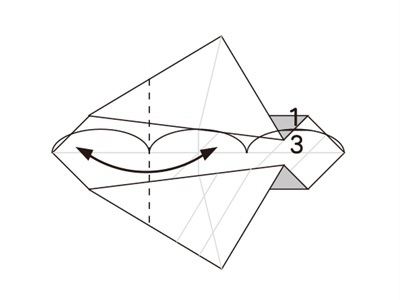
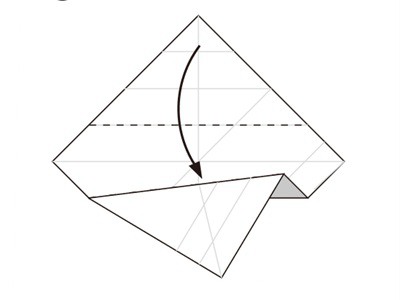
Step 13
: Frist fold the left part to right along the NO.1 dotted line.Then fold along the No.2 dotted line.
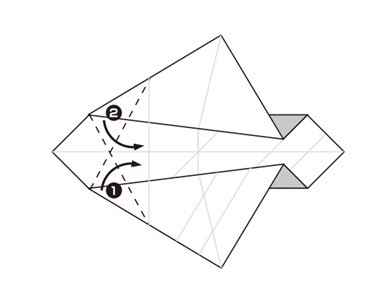
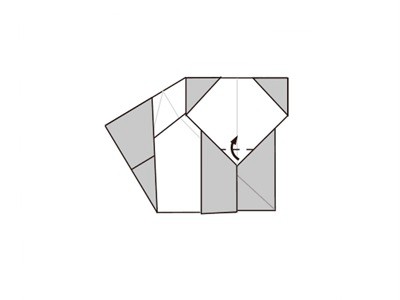
Step 14
: Fold the left corner to the right along the dotted line.
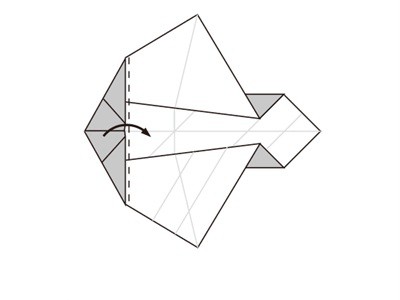
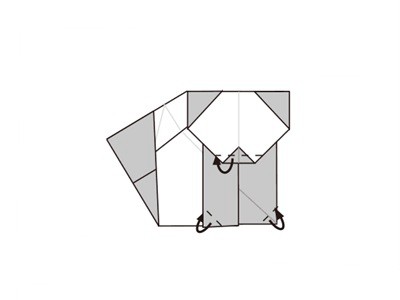
Step 15
: Fold in half by folding the top part backward along the center line.

Step 16
: Rotate the paper about 45 degrees.
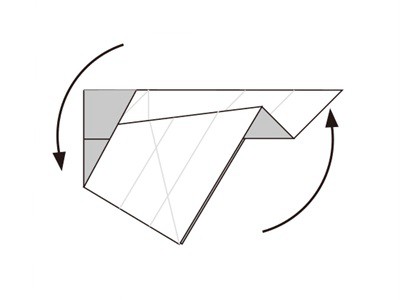
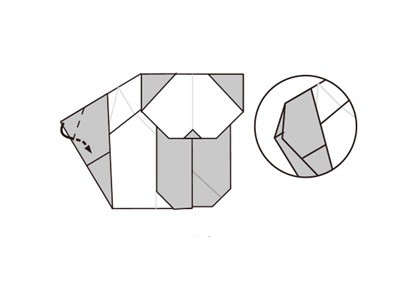
Step 17
: Open the top flap along the dotted line,then flatten.
Step 18
: Fold the top corner backward along the dotted line.

Step 19
: Fold the bottom corner of the upper layer upward along the dotted line.
Step 20
: Make an Inside Reverse Fold on the left corner along the dotted line.
Step 21
: Draw eyes and finished .
Now you know how to make a paper panda! Easy wasn’t it?Like this project if you like this origami!